For the most part five minute faces are fun to see what you can accomplish. I know that I love them! I thought though that realistically we may have a bit longer than that. If my husband asked me out and found a sitter for the kids I know he would at MiNiMuM give me ten minutes. So HeRe it is a 10 minute smokey eye complete with lashes. Look polishes, classy, sophisticated QUICKLY! Enjoy =).
Products Used:
Revlon Color Stay Foundation in Early Tan
MAC Studio Fix Powder in NW 25
Nicole Miller Bronzer
Coastal Scents Blush (top row first color)
UDPP
Naked Palette
– Creep
– Virgin on lid and brow
Nicole Miller bronzer just above Creep
Lash Blast Mascara
Demi Whispies lashes in black
Coastal Scents bottom corner browns for brow
Honey Love lipstick from MAC
Clear Lipglass from MAC
Blacktrack Fluidline from MAC
How is it that beach-loving celebs like Jennifer Aniston and Cameron Diaz always look picture perfect as they climb out of the pool or walk out of the ocean? Aside from having amazing bodies, many of them are probably wearing waterproof makeup. If you enjoy water sports (or tearjerker movies) and want to look your best without worrying about makeup dribbling down your face, try switching to waterproof products. Here are some of my faves this summer: Sephora’s Flashy Liner Waterproof is a soft and creamy eyeliner that glides on smoothly and then stays put. It’s got a bit of sparkle to reflect light, but don’t worry — it’s not too glittery for daytime. I like Flashy Black and Flashy Green ($8 at sephora.com). L’Oréal’s Voluminous Waterproof Mascara (about $7 at drugstores) has been my go-to summer mascara because it builds volume that holds up under water, in extreme humidity, and through a sweaty workout. This year I’m also loving Giorgio Armani Beauty’s Eyes to Kill Waterproof Mascara, which is lightweight and leaves my lashes feeling soft ($30 at barneys.com). Make Up For Ever’s Aqua Lip waterproof Lip liner pencil ($17 at sephora.com) stays put all day and comes in 18 shades (I like Nude Beige). I also like Prestige’s Waterproof Lipliner (about $5 at drugstores and ulta.com), which comes in 10 colors. To avoid looking too made up, choose a shade close to your lip color and use short, feathery strokes to apply it along your natural lip line. These liners can be drying, so apply lip balm or gloss on top when you get out of the water.
Want to win a Makeup Forever Aqua Lip waterproof Lip liner pencil in Nude Beige? Tell me how you keep your makeup from melting during the summer. Send your tips to submissions@askjessicawu.com. I’ll pick 5 lucky winners and share your tips in an upcoming Shout-out!
We have had a lot going on with family and will be traveling to Oregon for a funeral that we were all not expecting. Just wanted to let you know that I would be taking a bit of a hiatus from the blog. I’ve had people ask what they can do to help during this hard time and it really would help, if you would like, to email me with your thoughts on different products or your favorites for July. Maybe send in a video tutorial or a written one that everyone could follow. I could post them instead of putting one together myself. That would be so nice and thanks to those that have been so supportive. My followers are by FAR the best ever!!!!!!!!!
Elizabeth Taylor was such an icon. In the movies she was on point and direct and with makeup (in her earlier years) I felt she was one of the greats! I felt it was time I did a tribute to the look and feel of this Hollywood starlet. Here is my take on her look in general, not from any one picture but I thought I’d put up a few that would demonstrate her rich beauty. I think it took me a while to pay homage to her because for the longest time she left a bad taste in my mouth. She was lovely but unfortunately stole a few husbands in her day. I LOVE Debbie Reynolds and Liz took her hubby = (…look at me talking about them as if I know them! =) Anyway, I loved her look, at least, and wanted to give my interpretation of all the little details that made up Elizabeth’s face. I hope you like it!
Can’t you just SEE Camilla Belle playing her in a movie??? It’s ridiculous how much alike they look!
There are so many out there and so many that are great. A lot of them look the same too with only little differences…so WHICH ONES ARE USED FOR WHAT? Here I show you some of the ones I have and which ones I use for what. Remember that there are NO rules to makeup and that includes application. These are just my lil opinions and how I use my brushes. That being said, ENJOY!!! =)
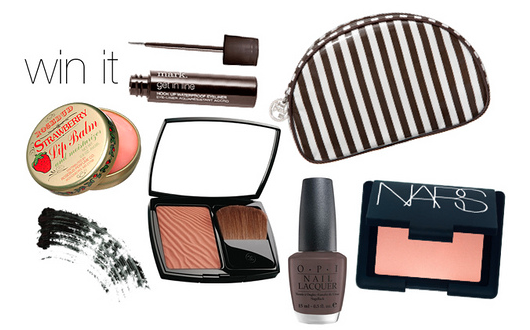
Can I confess? Will you judge? I’m going to have to take the chance…..I {heart} Lauren Conrad. I truly believe that if we were in the same town…….we would be besties! For SURE!!! She has a blog, not that I should be surprised, but I ToTaLlY didn’t know that so when I found it I was pretty stoked! This updo was one of my FAVS of hers on whatever colored carpet she was on =). I am so glad that she made a tutorial on it!!! She has a giveaway going on right now and if you jump on over there you can enter to win some of her beauty favs (pictured below). Other than the giveaway she also has TONS of great tutorials on clothes, hair, makeup, and primping. What girl wouldn’t love that??? Seriously, check this girl out. You will NOT be disappointed!!!
The Beauty Department’s email box is literally flooded with requests for updos, so here’s a fun tutorial from Kristin Ess to get us all going!
This is always a favorite for attending an event. This updo looks gorgeous on any hair color but particularly amazing with highlighted hair because it gives the hair lots of depth and dimension. For lack of a better word, I love the way it becomes “swirly”. Best thing is; it’s easy to do, gorgeous and keeps your hair out of your way for the night.
I made this a printable tutorial, so all of the steps are next to the photos.
Enjoy!
Tools you’ll need:
Curling iron (to prep the hair with waves)
Sectioning clips
Teasing comb or brush
Clear elastic rubber band
Bobby pins
Light to medium holding hairspray (to mist over at the end)